Install on Antigravity
Antigravity uses a global MCP config file. Open it from Settings → Customizations, paste the config, and restart.
node --versionOpen Settings → Customizations → Open MCP Config
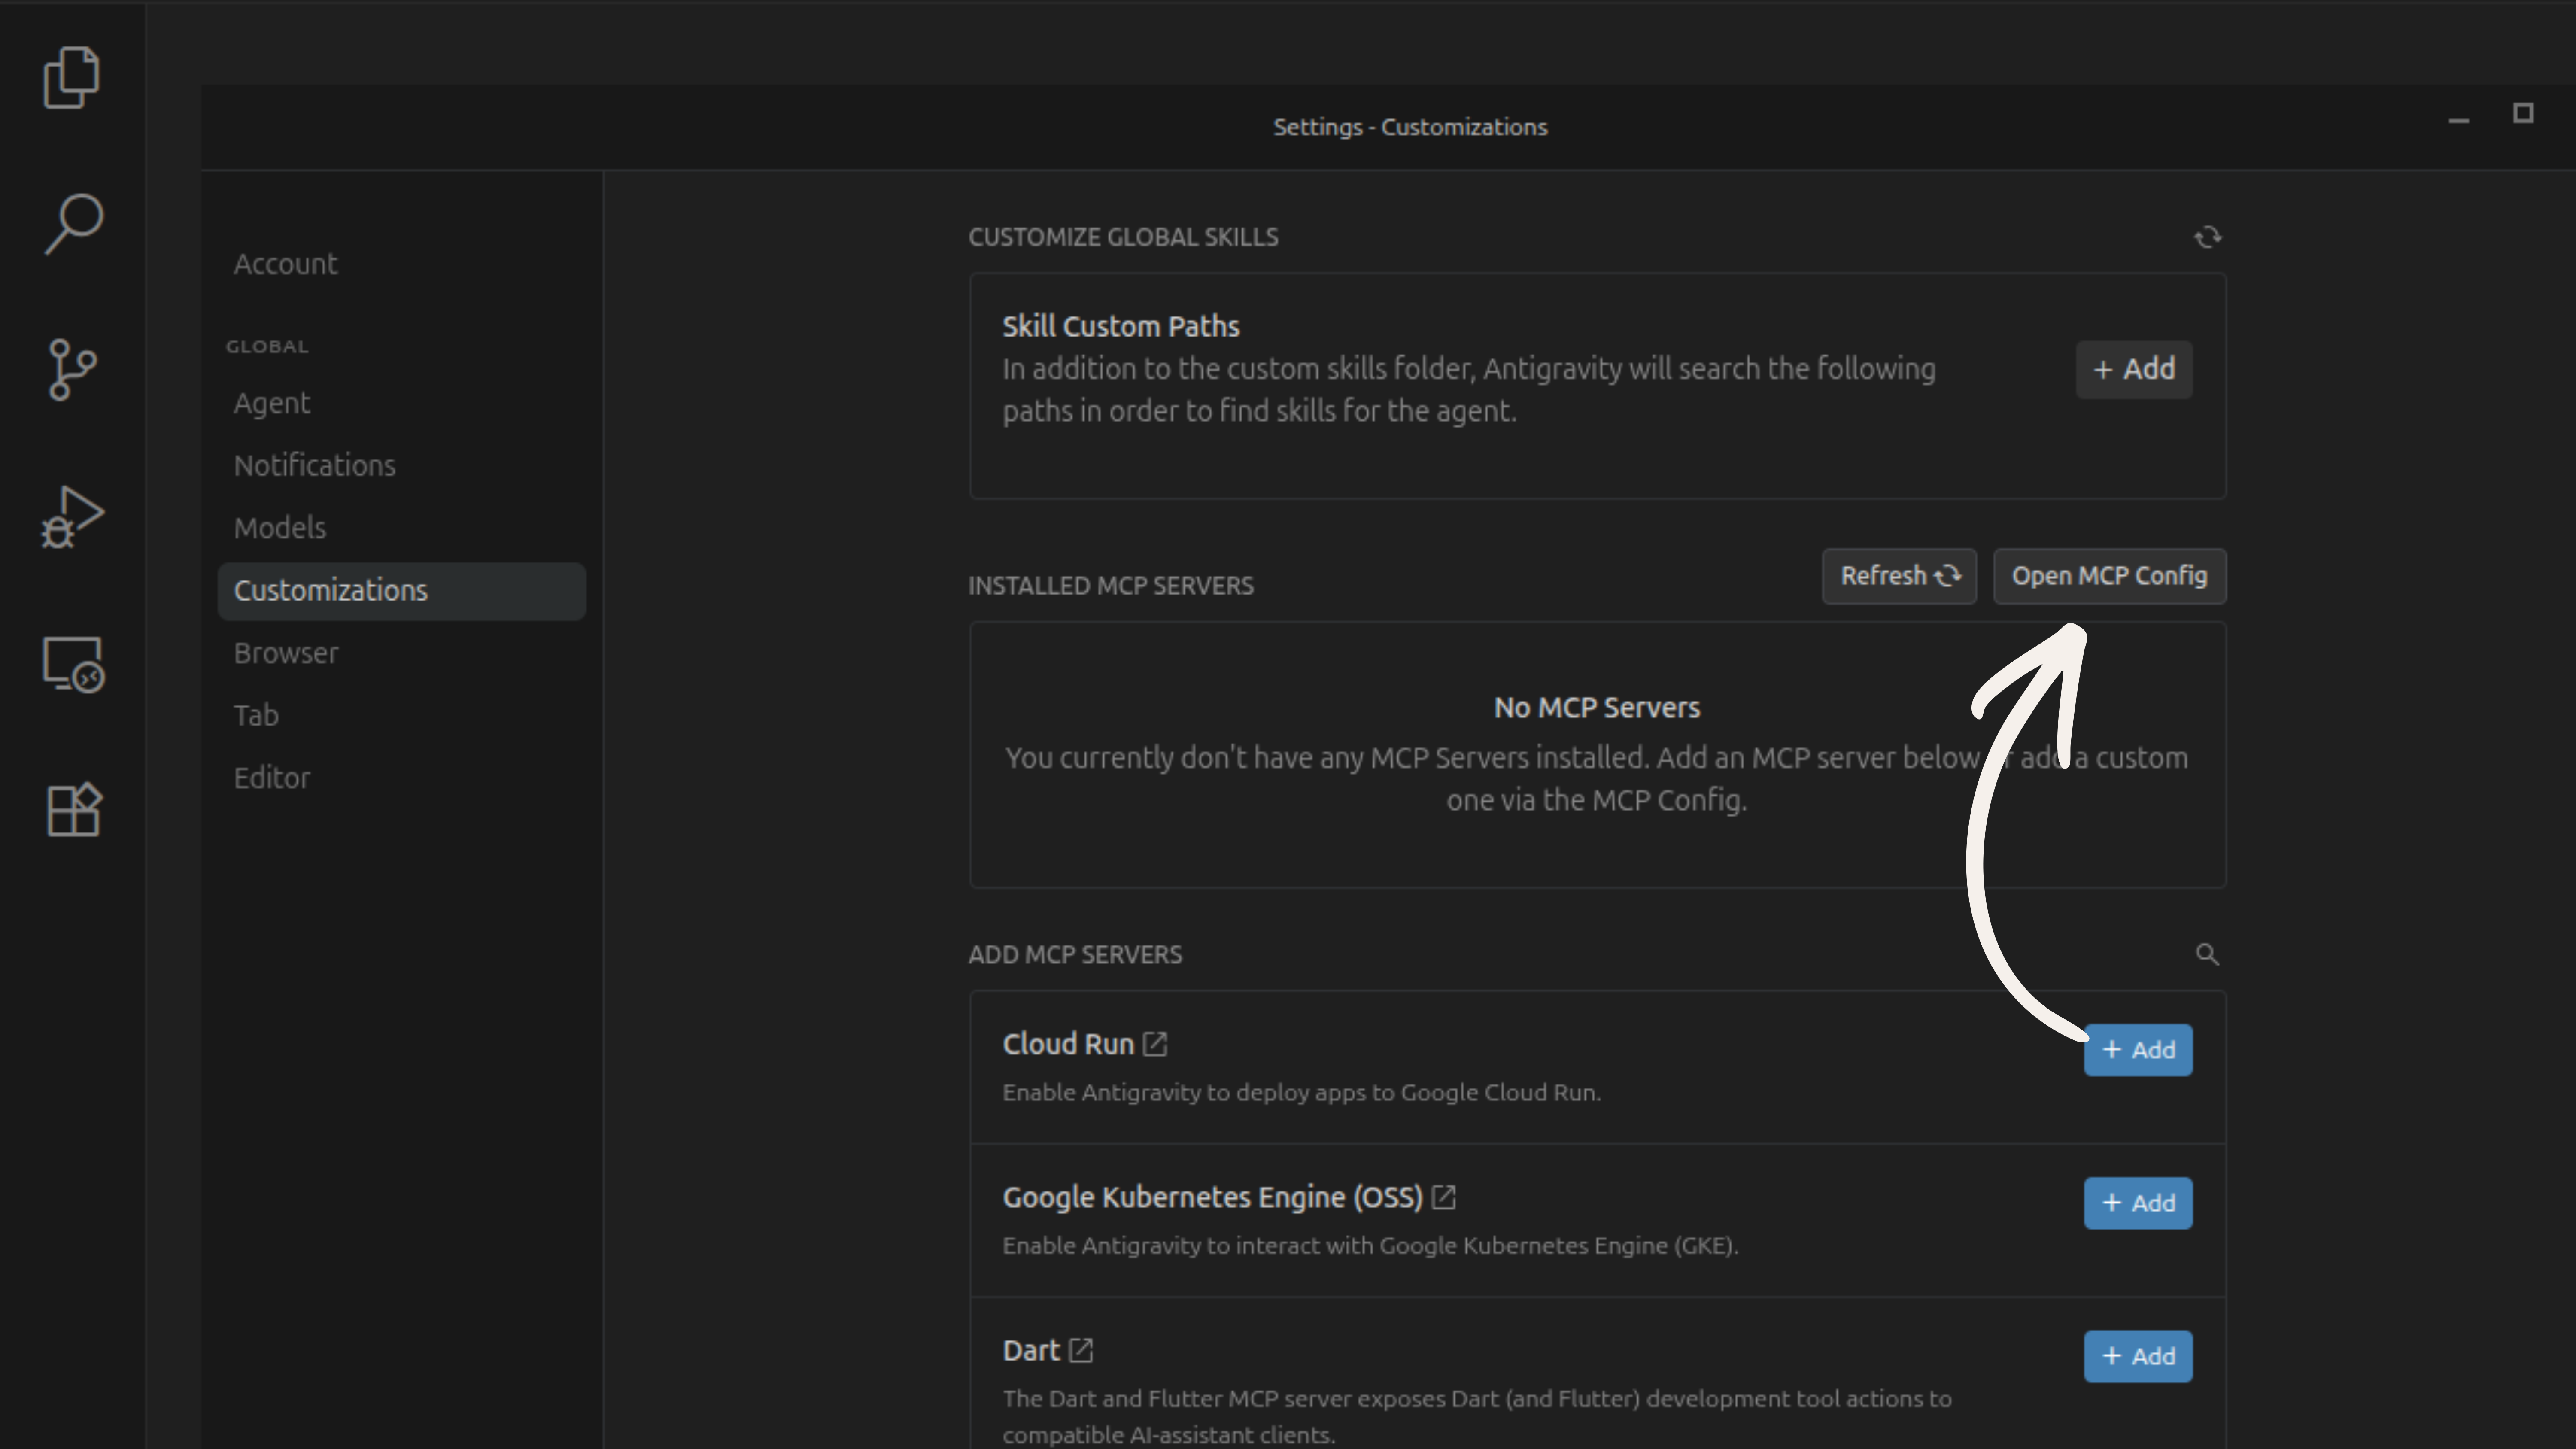
Open Antigravity Settings and navigate to Customizations. Under Installed MCP Servers, click Open MCP Config to open the global config file.
Paste the Veilguard config into mcp_config.json
The mcp_config.json file will open. Paste the following config (or add the veilguard block into an existing mcpServers object):
{
  "mcpServers": {
    "veilguard": {
      "command": "npx",
      "args": ["-y", "--package=veilguard", "veilguard-mcp"],
      "env": {
        "VEILGUARD_KEY": ""
      }
    }
  }
}
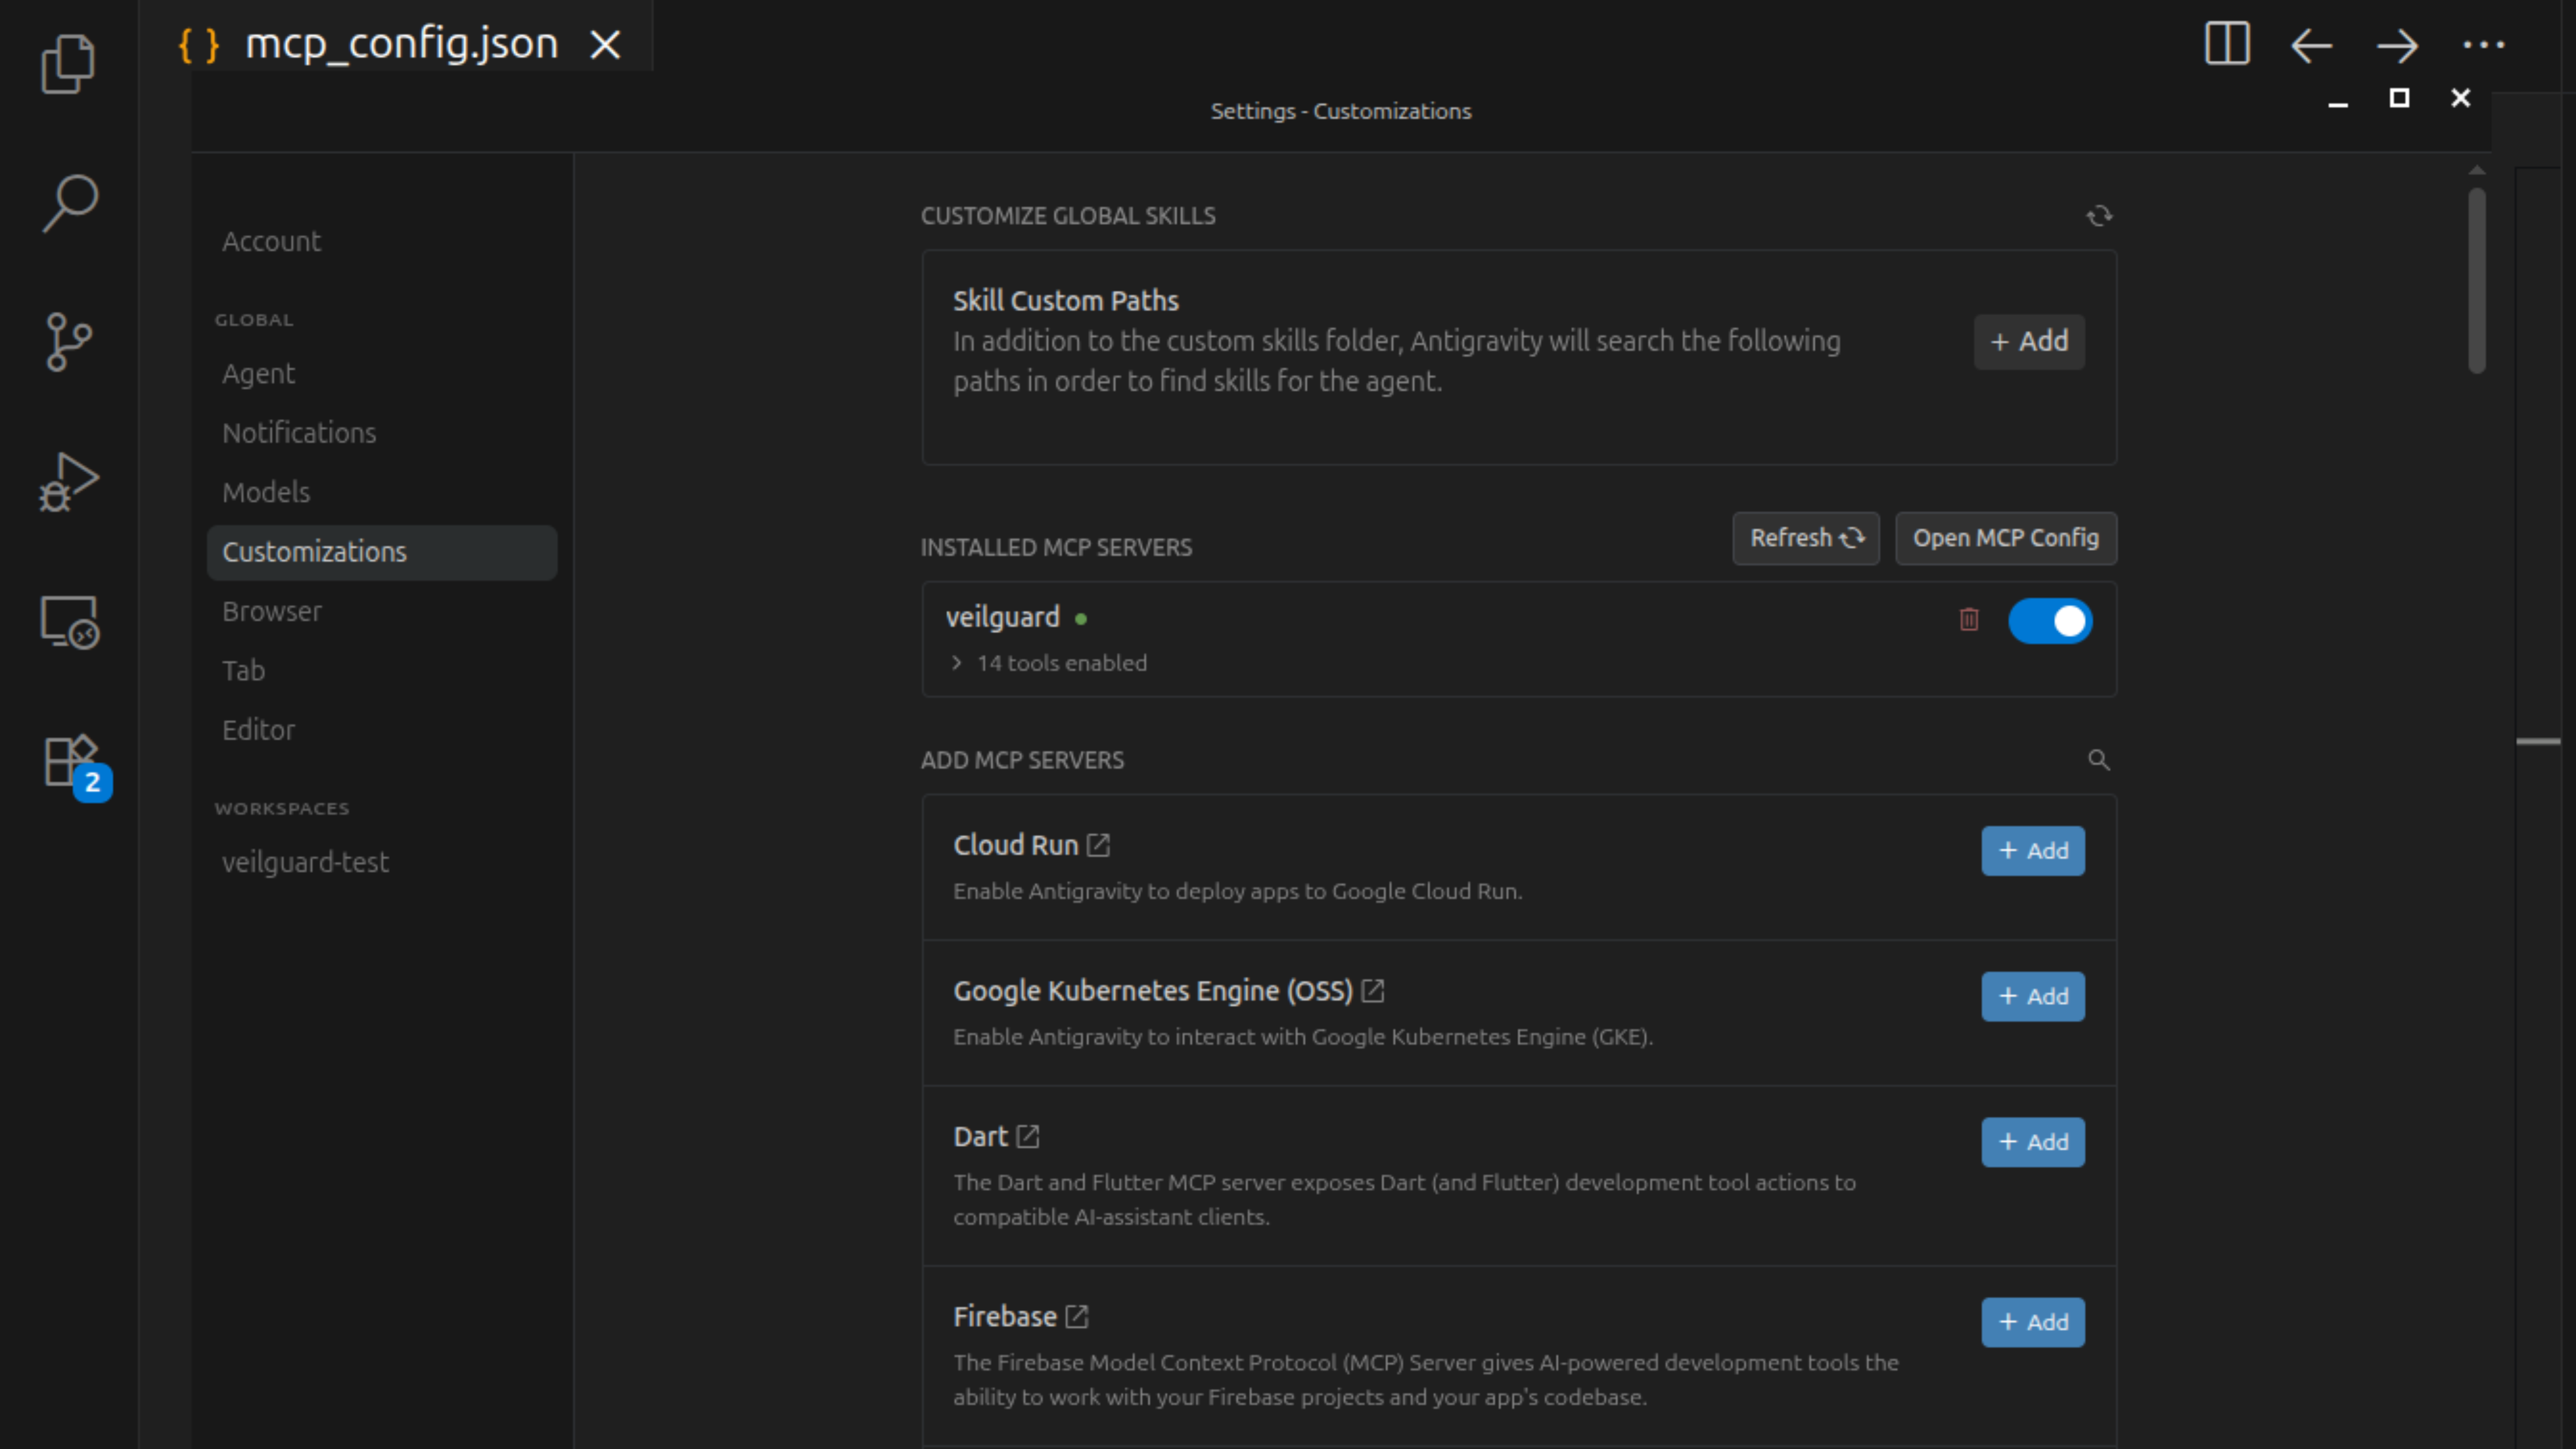
Save, then click Refresh in Customizations
Save the config file. Go back to Settings → Customizations and click Refresh. You should see veilguard listed under Installed MCP Servers with a green dot and 14 tools enabled.
Verify it's working
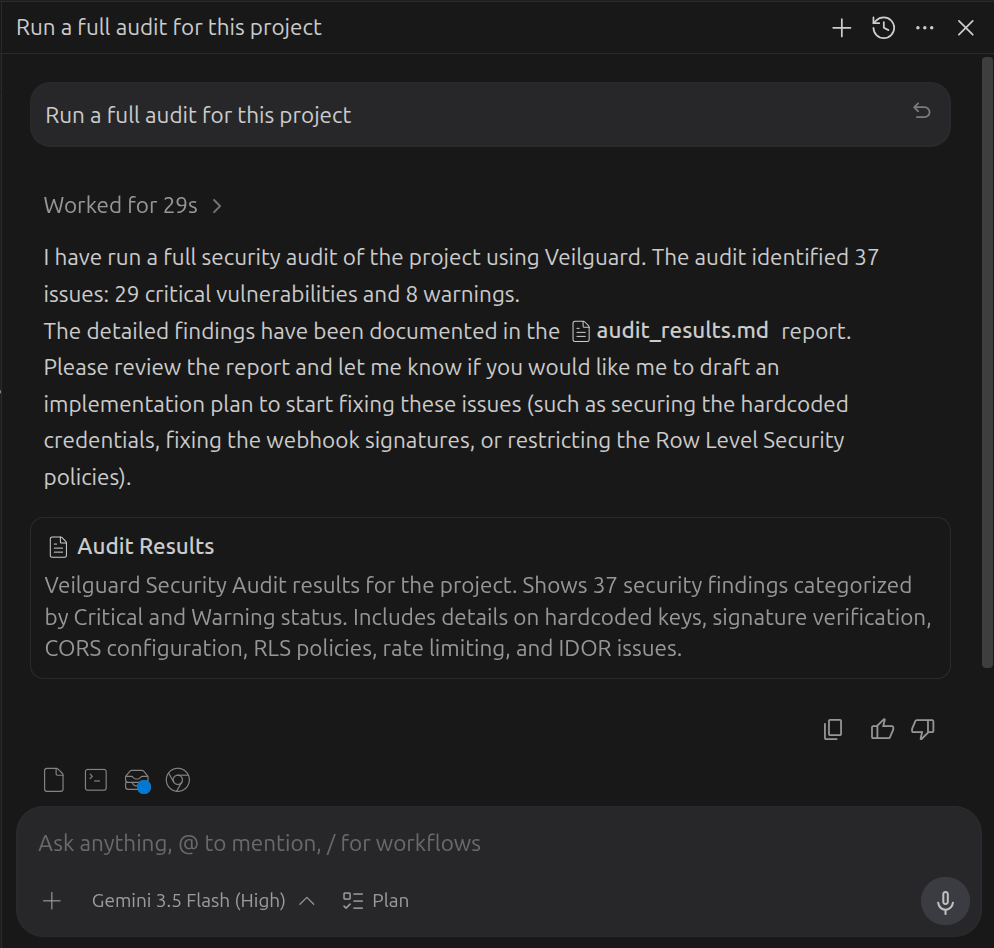
Open a new Antigravity agent chat and ask: "Run a full audit for this project". Veilguard will run all 14 security scanners and return a detailed report with findings.
Add your Pro key (optional)
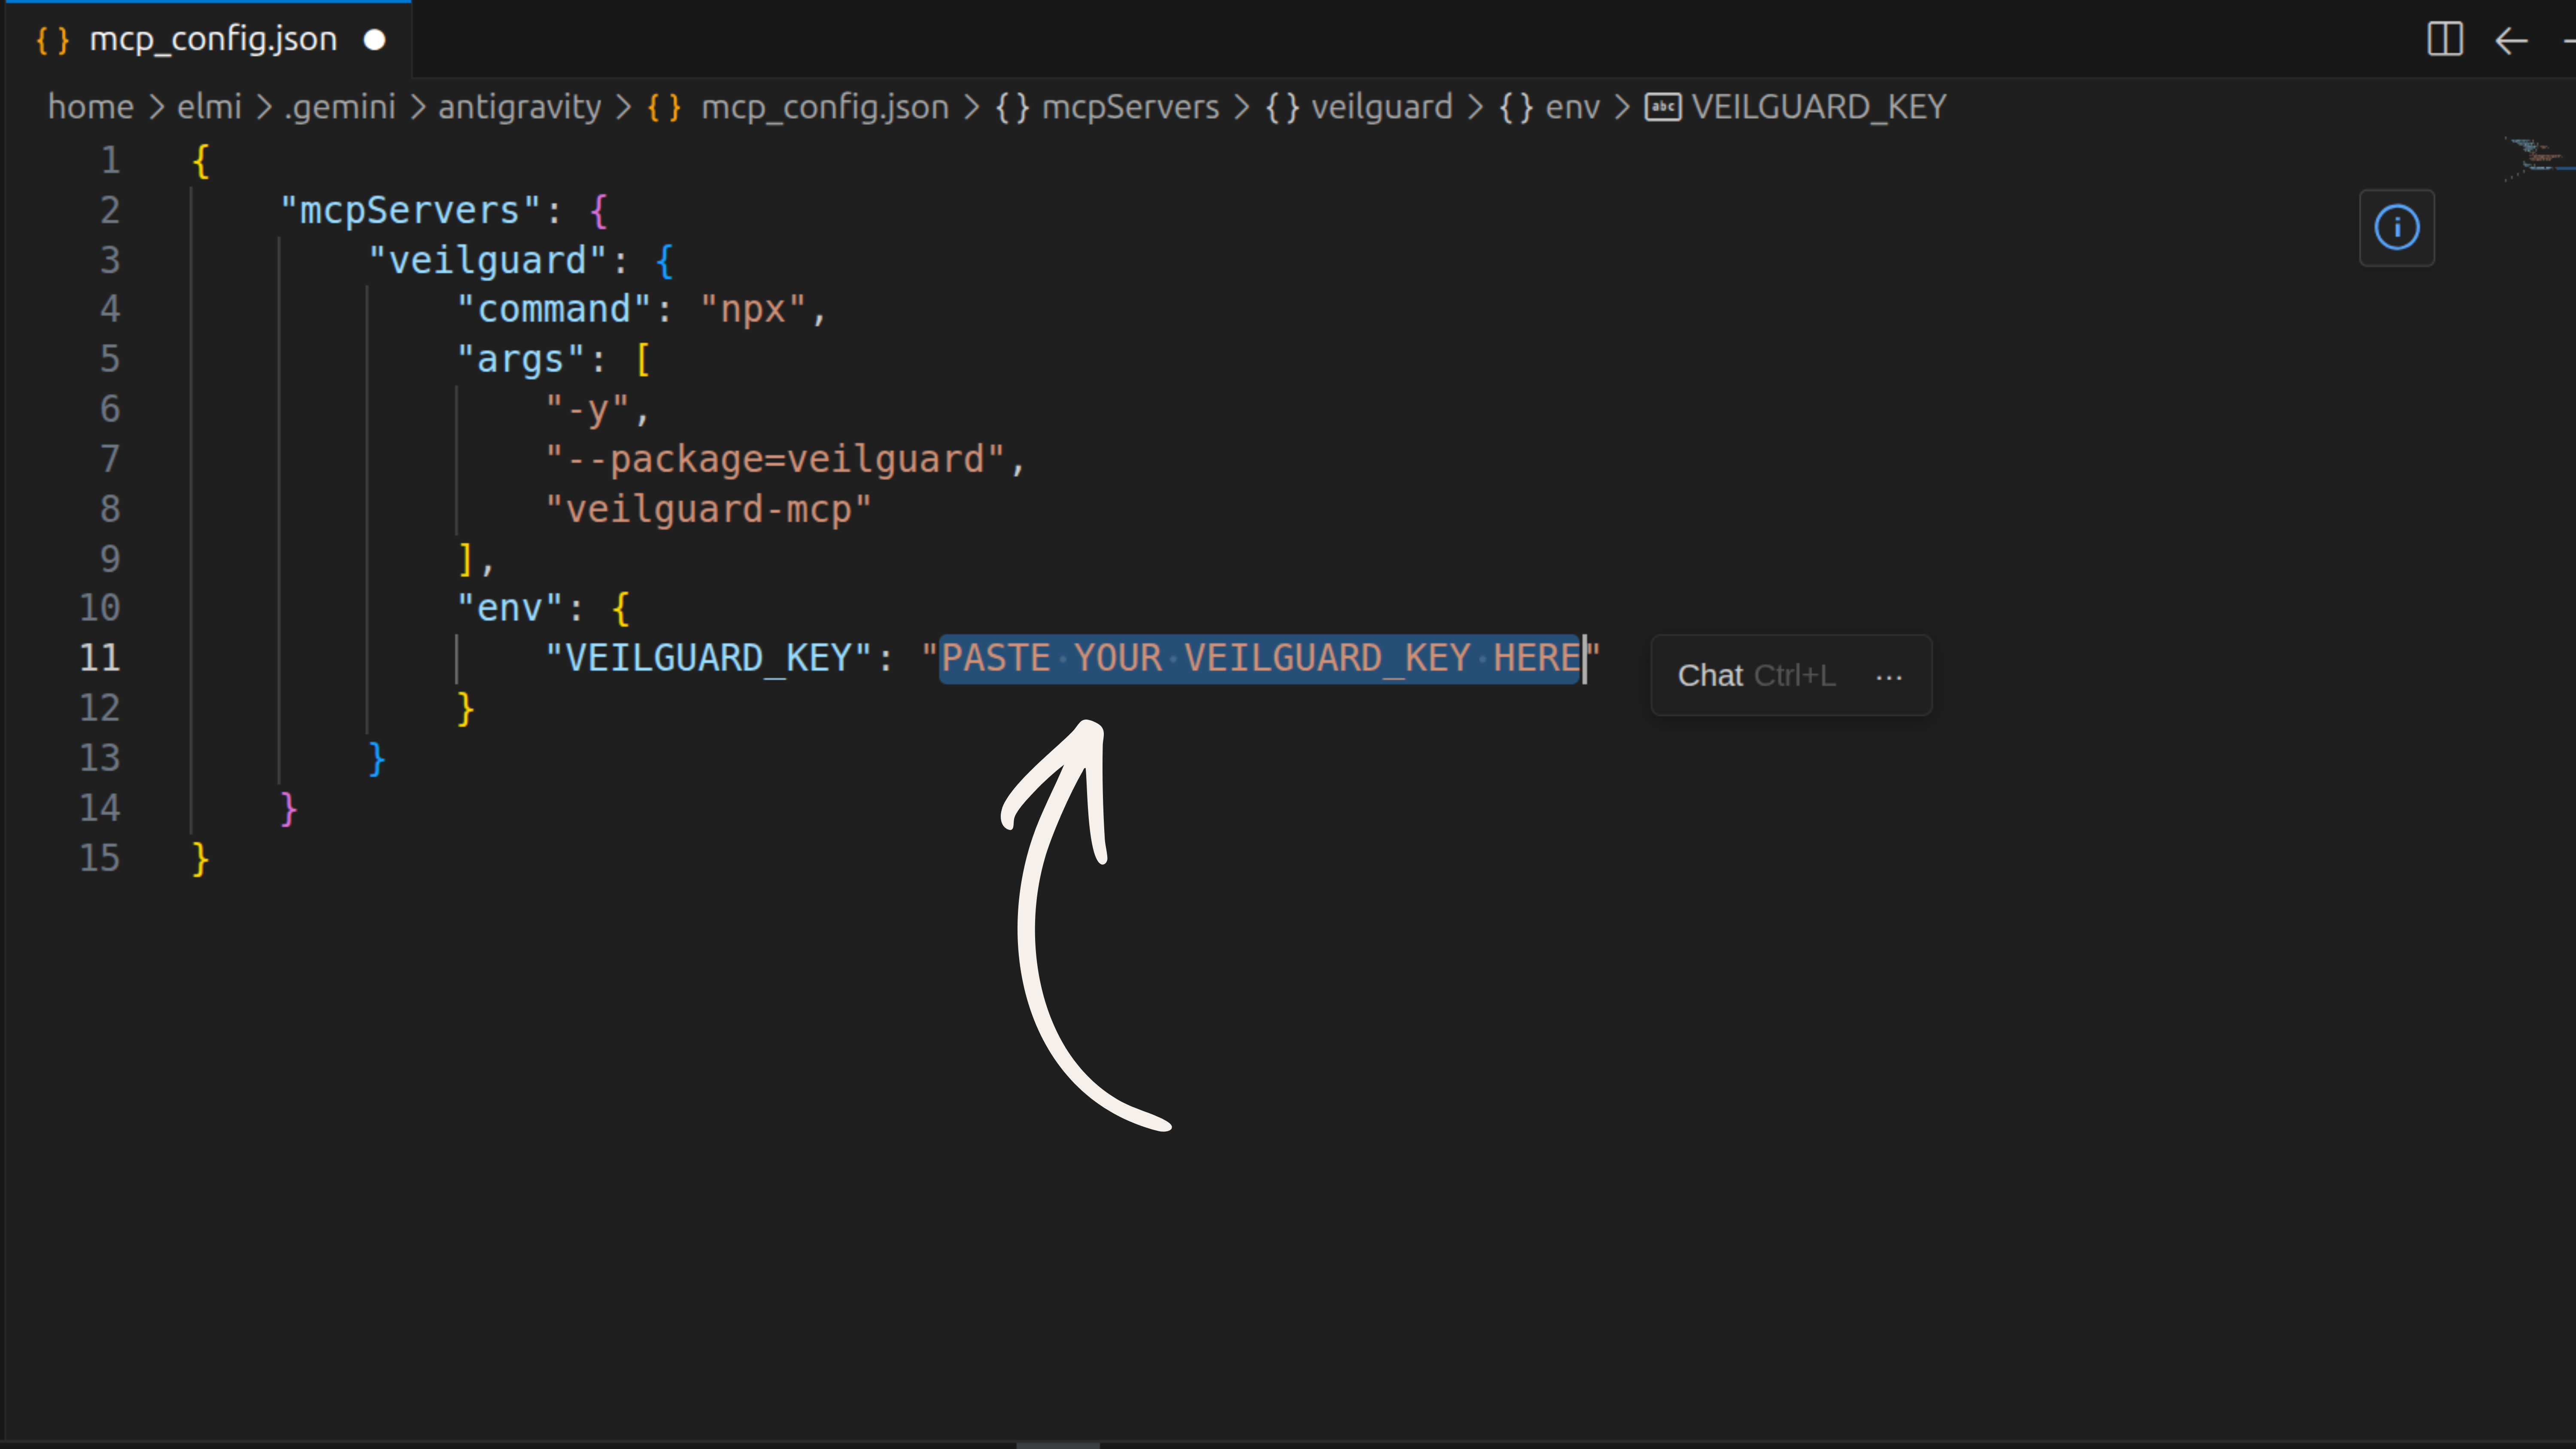
Go back to Settings → Customizations and click Open MCP Config again. Replace the empty string on VEILGUARD_KEY with your license key, save, and click Refresh.
Get a Pro key at veilguard.dev/pro. Keys look like vg_live_xxxxxxxxxxxxxxxxxxxx.
Notes
- •The MCP config is stored at
~/.gemini/antigravity/mcp_config.json— it applies globally to all Antigravity projects. - •Click Refresh in Customizations after any config change — no full restart required.
- •For auto-scanning, download the rules template to your project root.