Install on VS Code
VS Code has a built-in MCP wizard — no JSON editing required. Follow the Command Palette prompts and Veilguard installs in under a minute.
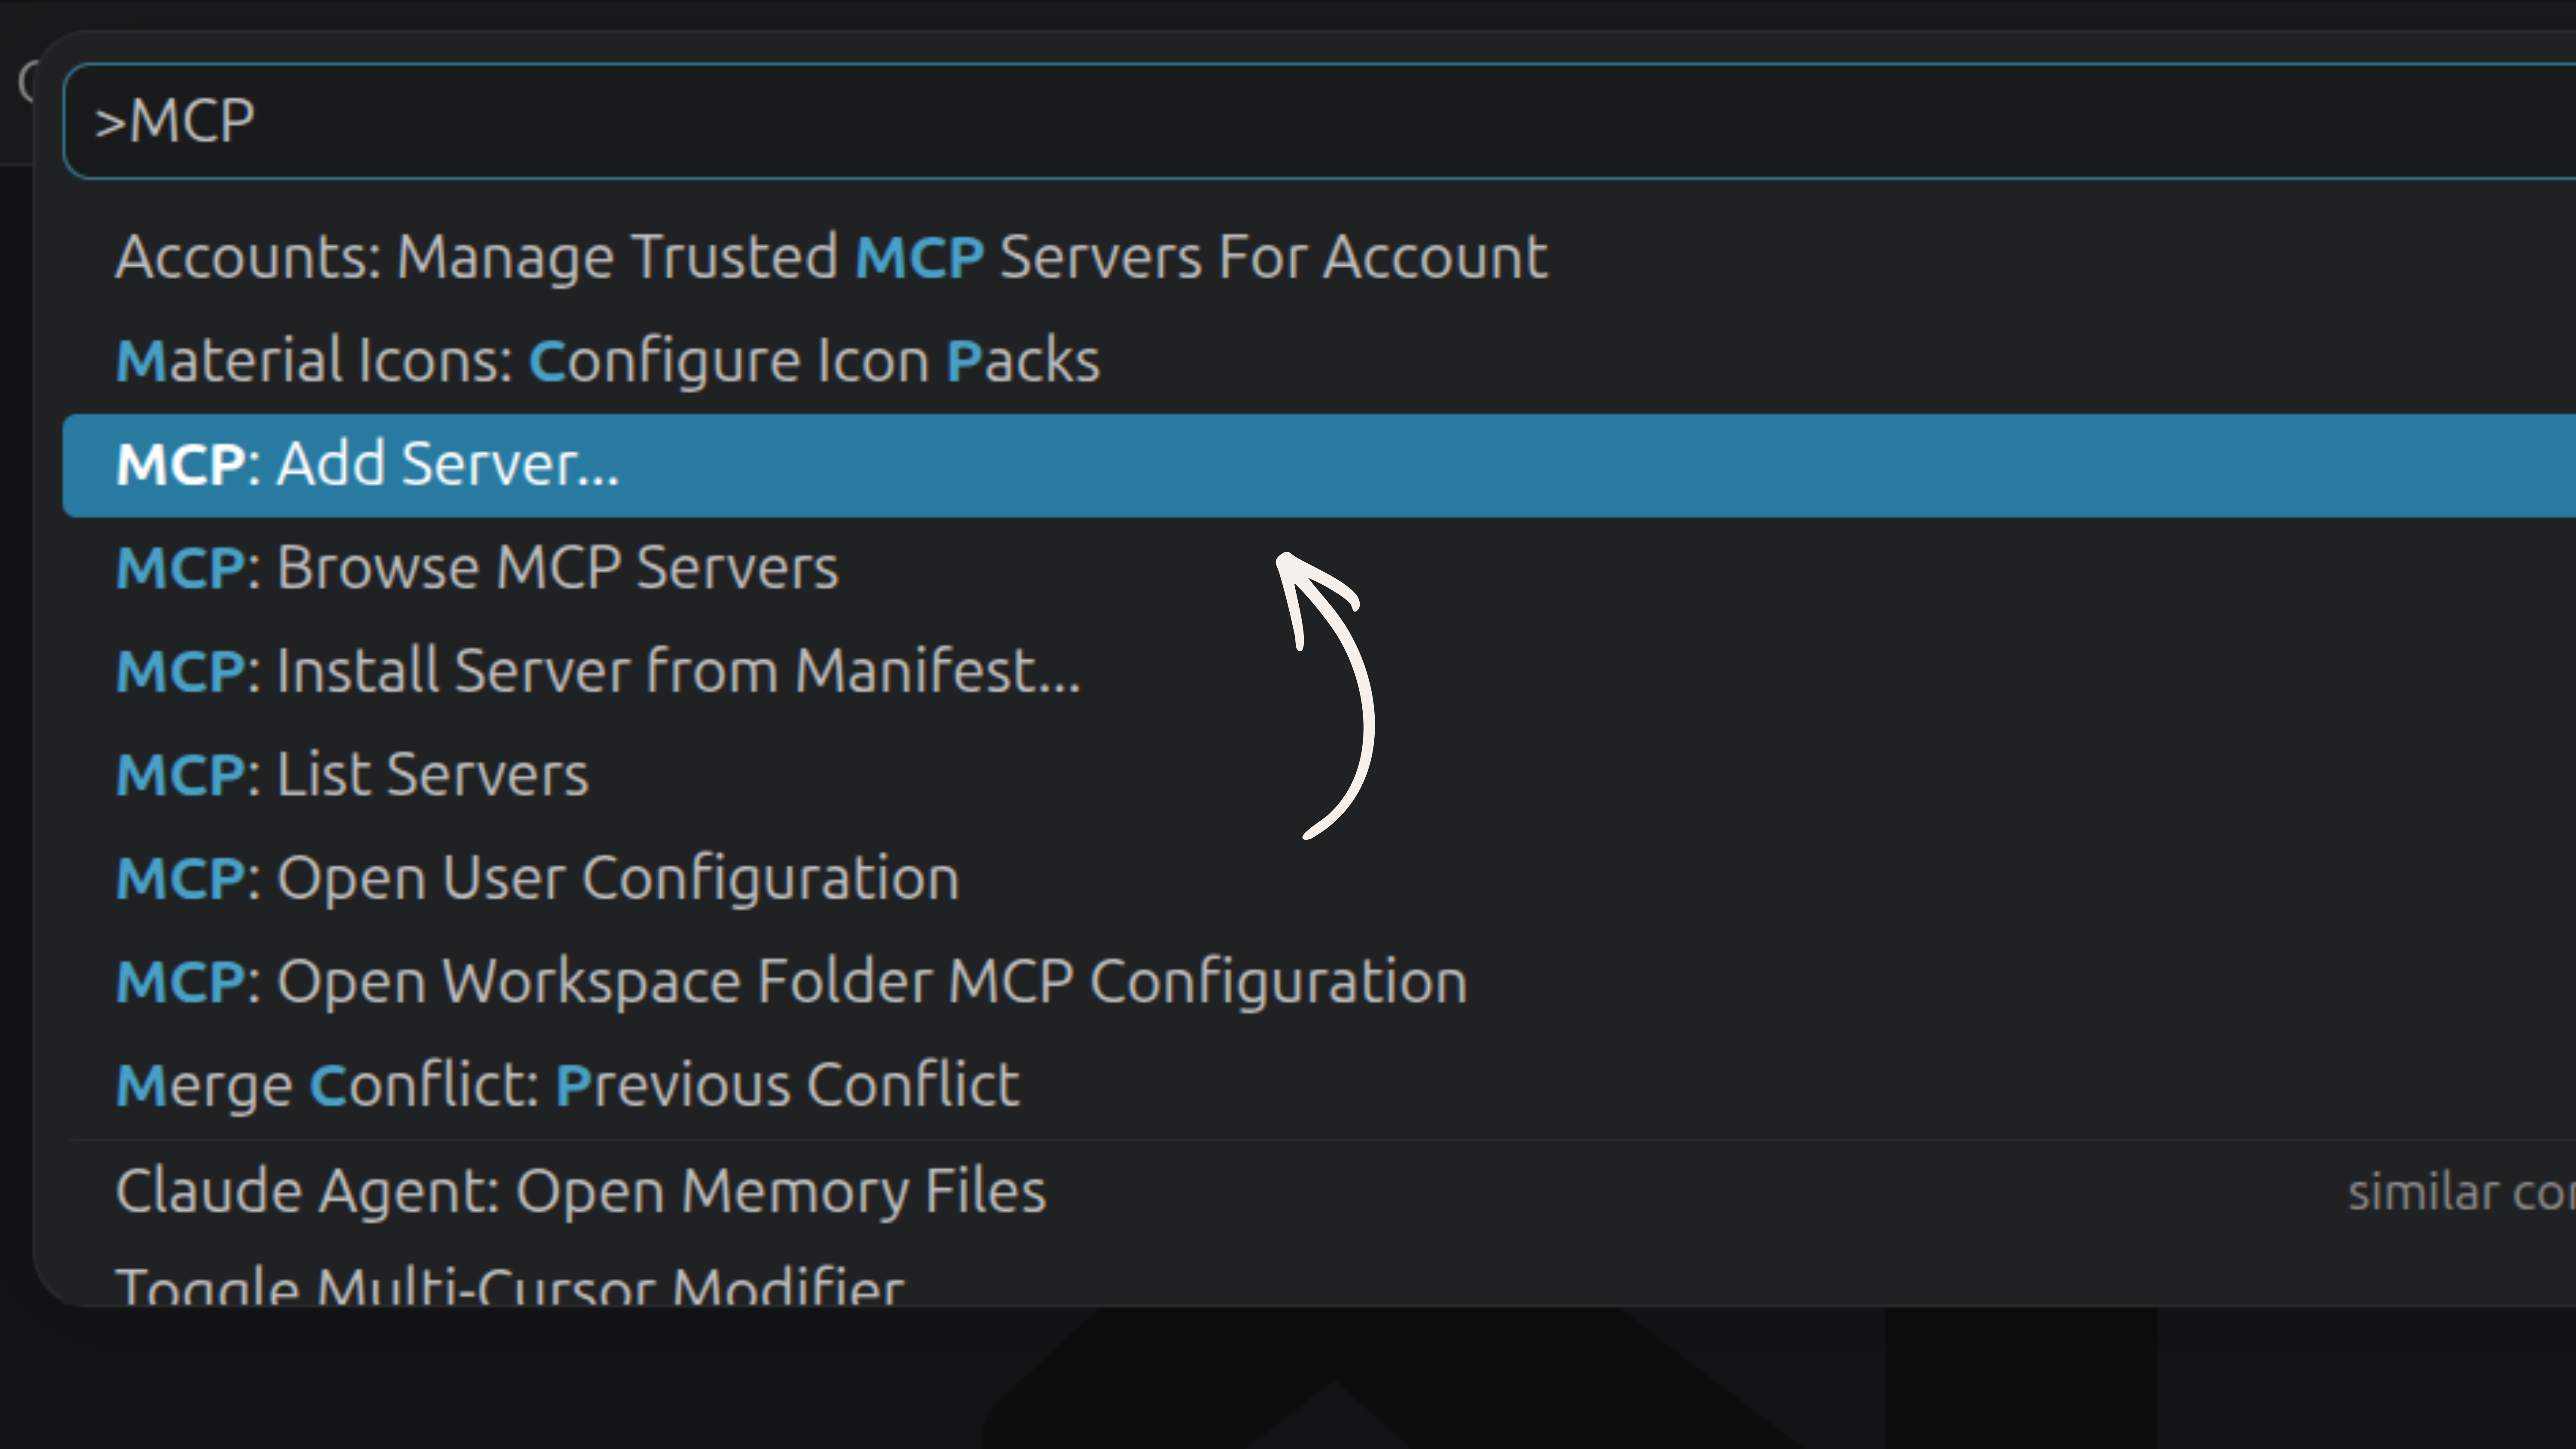
node --versionOpen the Command Palette → MCP: Add Server
Press Ctrl + Shift + P (or Cmd + Shift + P on Mac) to open the Command Palette. Type MCP and select MCP: Add Server...
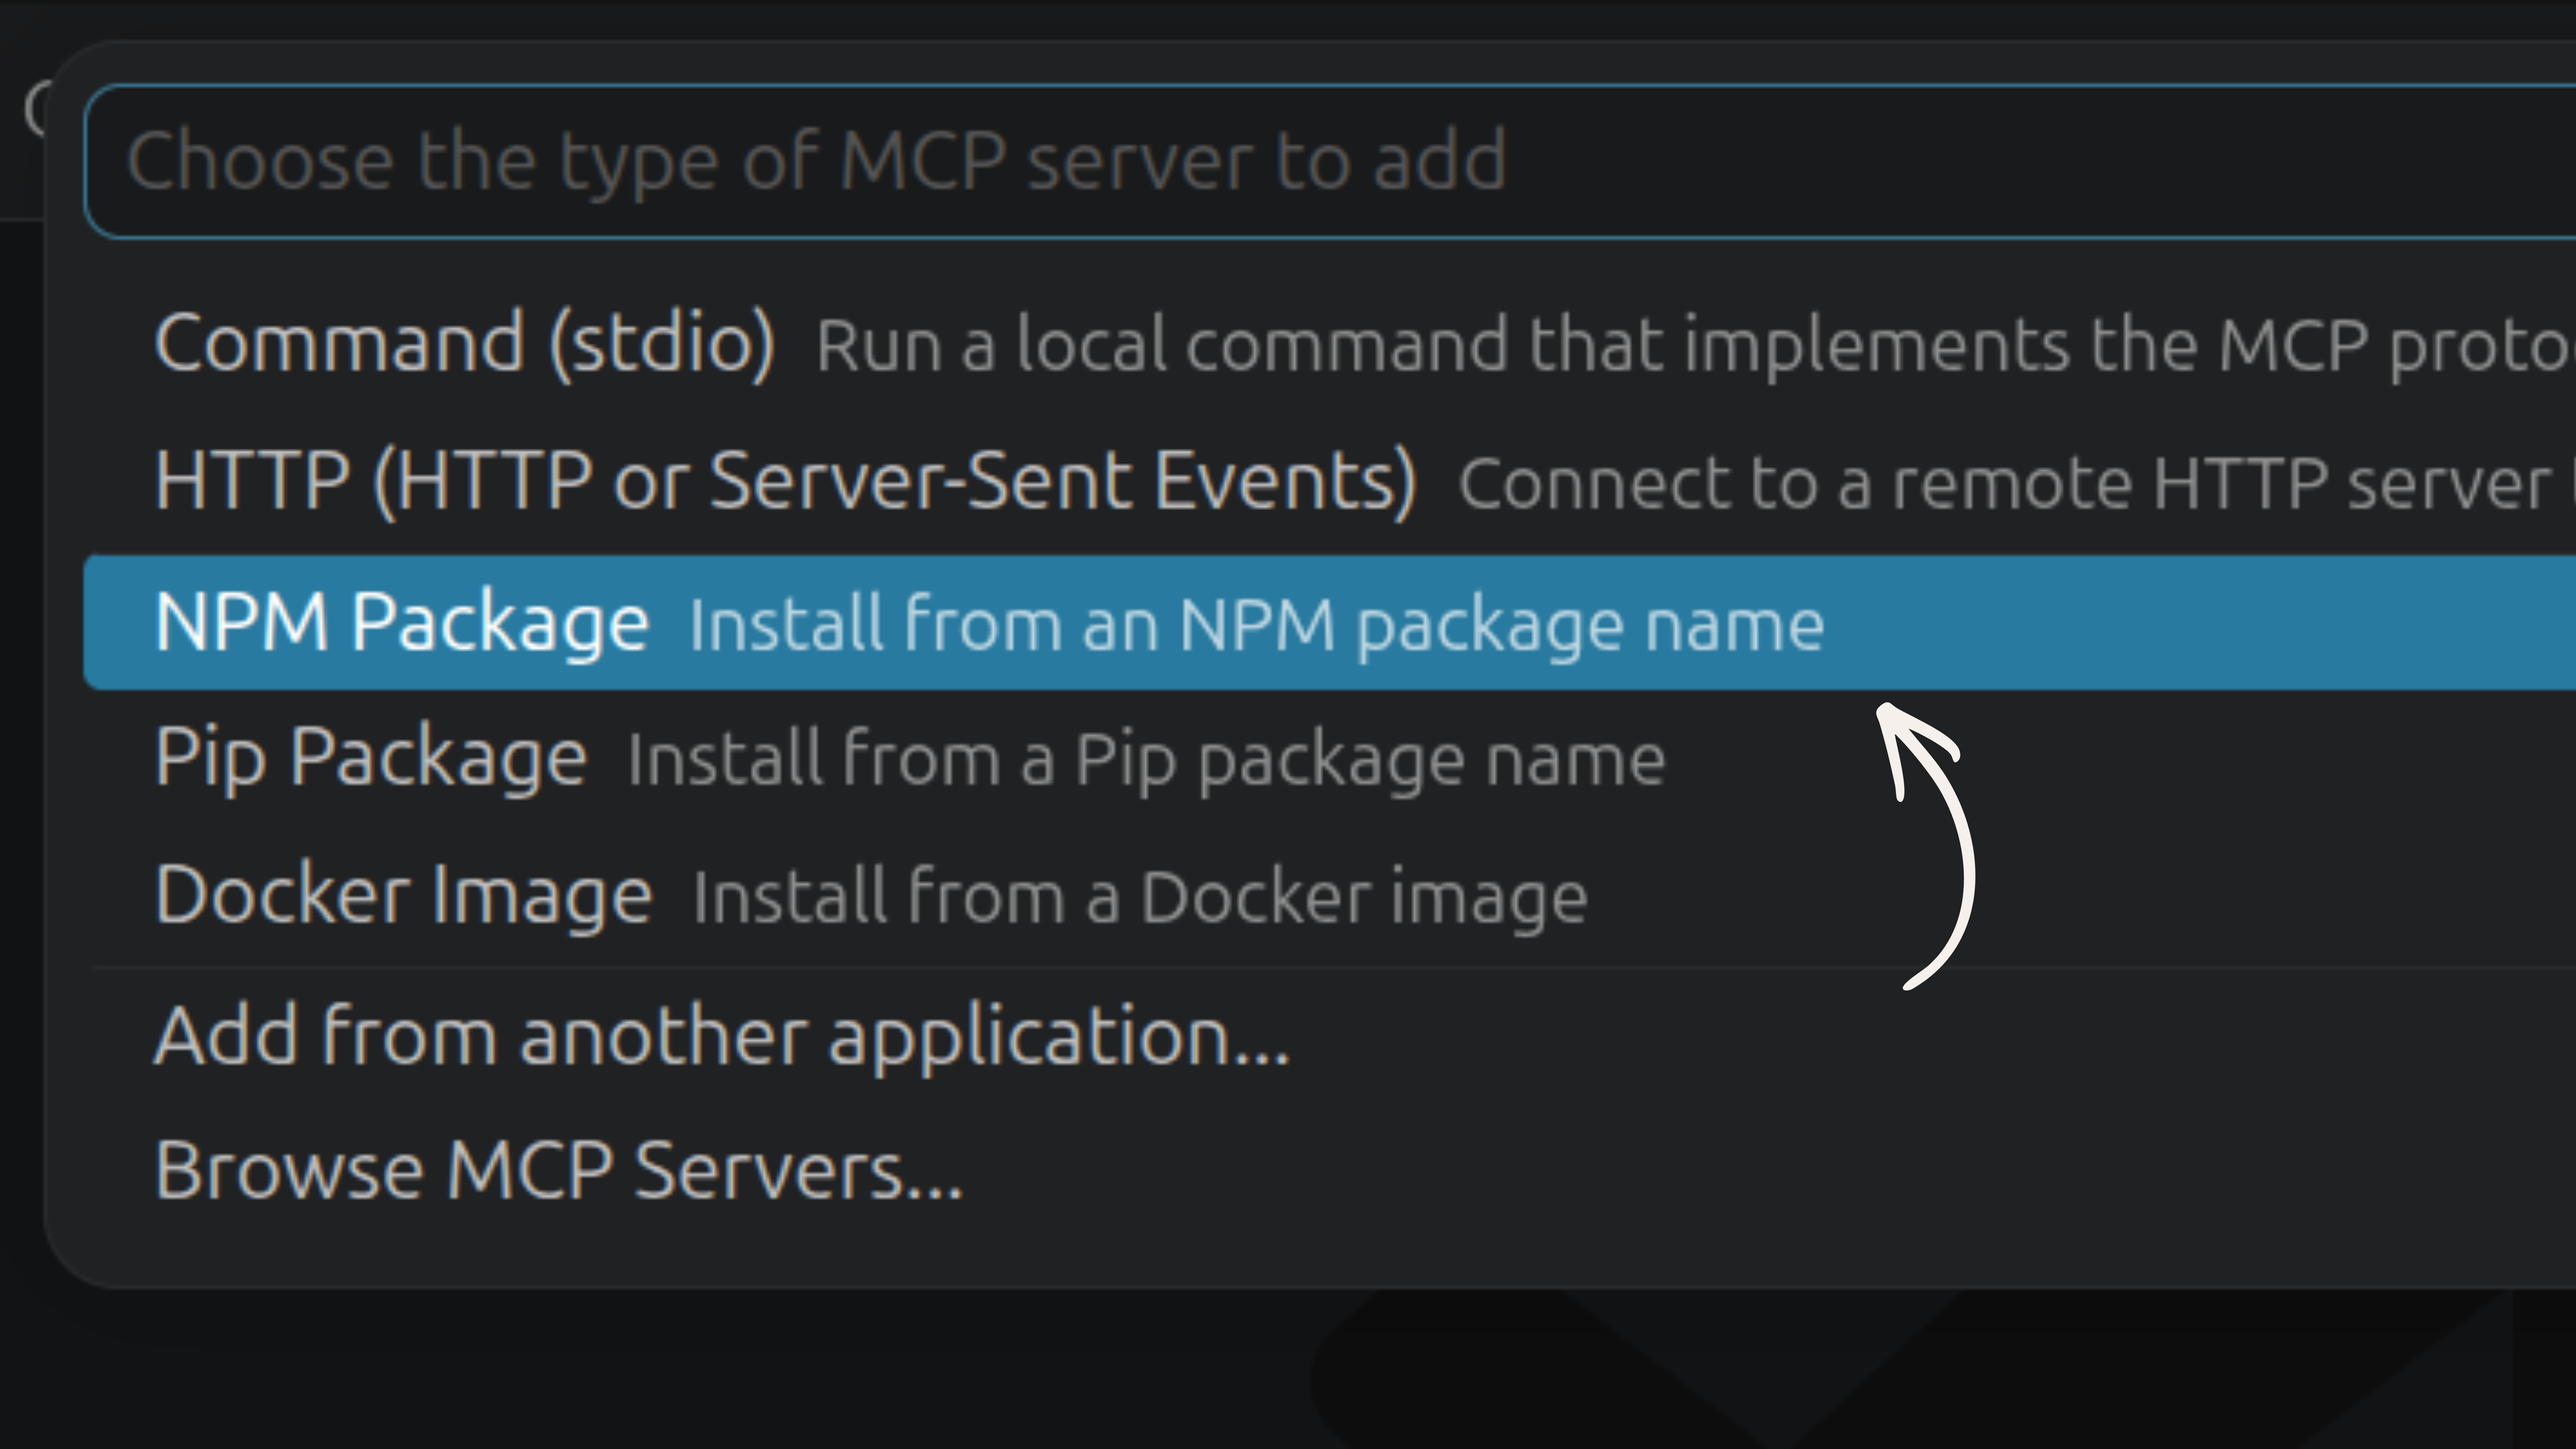
Choose NPM Package as the server type
VS Code asks you to choose the type of MCP server to add. Select NPM Package — Install from an NPM package name. This is the Model Assisted option highlighted in blue.
Enter the package name: veilguard
VS Code prompts Enter NPM Package Name. Type veilguard and press Enter.

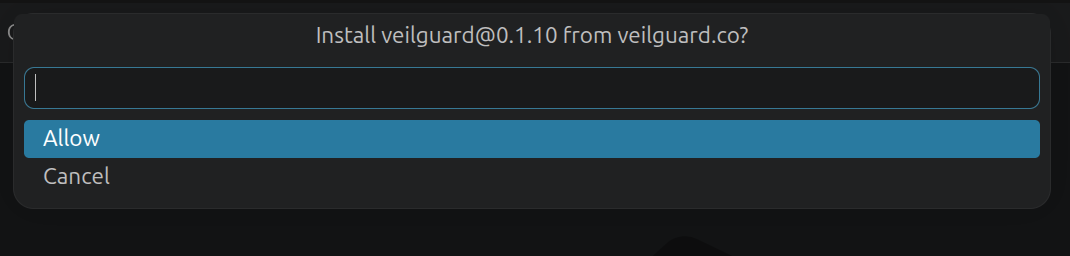
Click Allow to confirm the install
VS Code shows a confirmation prompt: "Install veilguard@x.x.x from elmimoha15?". Click Allow.
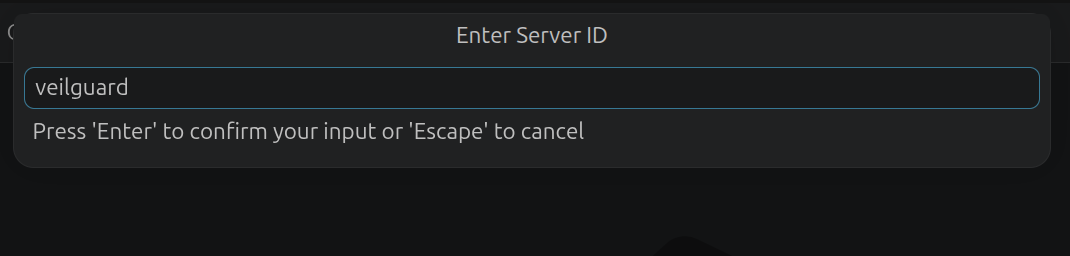
Enter the Server ID: veilguard
VS Code prompts for a unique identifier for this server. Type veilguard and press Enter.
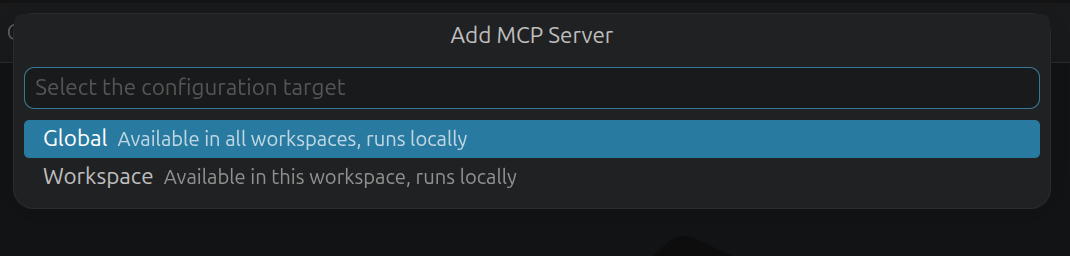
Select Global as the configuration target
VS Code asks where to save the MCP config. Choose Global — Available in all workspaces, runs locally — so Veilguard protects every project automatically.
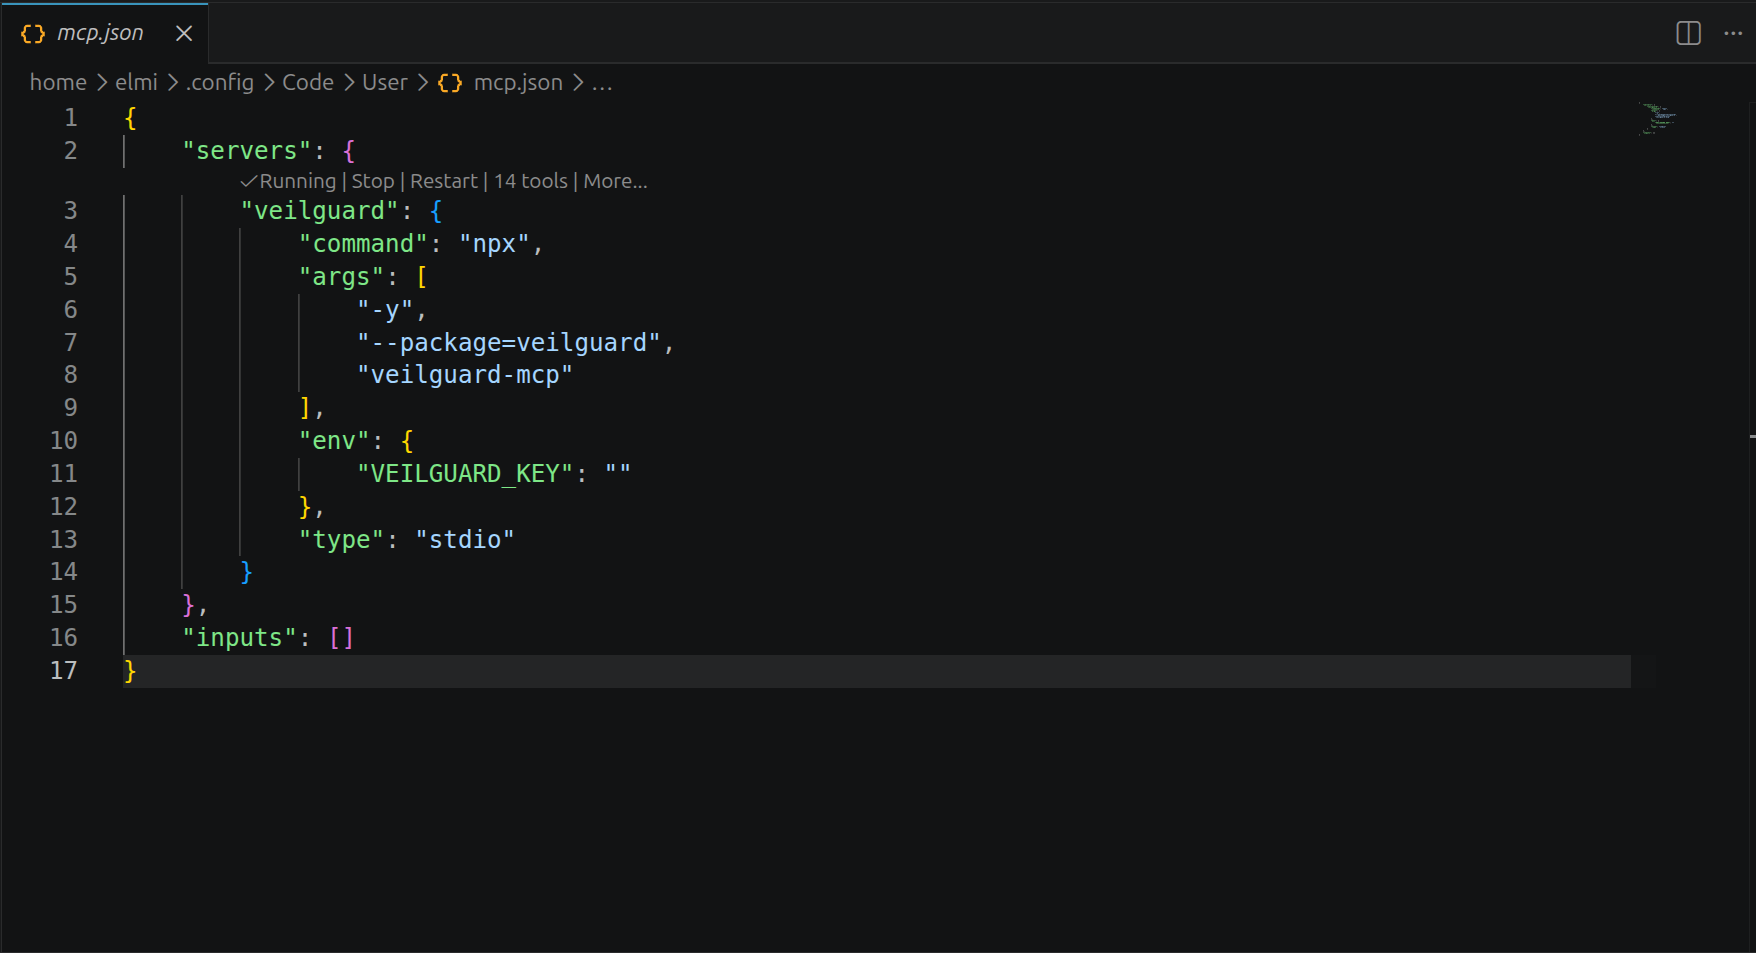
Verify it's running
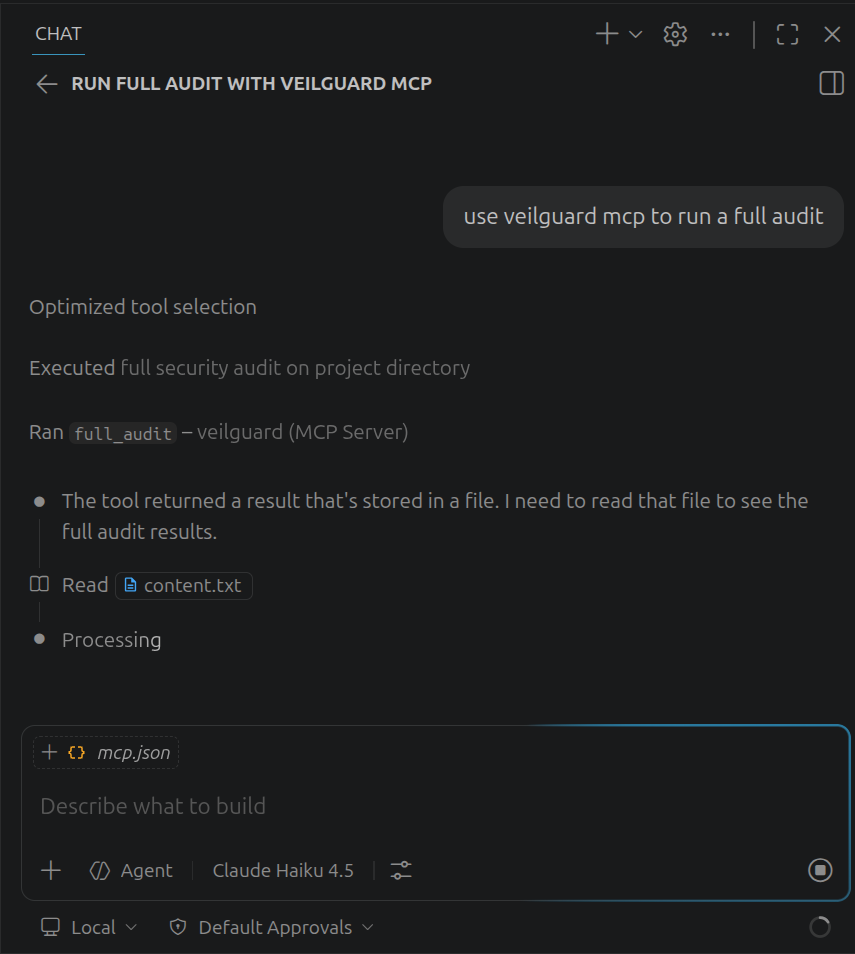
Open your mcp.json — you should see the Running | Stop | Restart | 14 tools status inline above the veilguard block. Then open a GitHub Copilot agent chat and ask it to run a full audit to confirm all tools are working.
Add your Pro key (optional)
Open your mcp.json (VS Code opens it automatically after install, or find it at ~/.config/Code/User/mcp.json). Replace the empty string on VEILGUARD_KEY with your license key and save — the server restarts automatically.
Get a Pro key at veilguard.dev/pro. The server restarts automatically when you save.
Notes
- •VS Code stores the global MCP config at
~/.config/Code/User/mcp.jsonon Linux,~/Library/Application Support/Code/User/mcp.jsonon macOS. - •For auto-scanning with GitHub Copilot agent mode, download the
.cursorrulesfile to your project root. - •The MCP server requires GitHub Copilot or another MCP-compatible AI extension to call the tools.